
By Chris Adamson
During what seemed like a routine annual MOT inspection, my friendly examiner informed me that it was unlikely that the headlights on my 1998 MGF would pass the following year due to the reduced intensity of the headlights.
The culprit was an opaque like milky film that was obscuring the inner dipped beam diffuser lens – a problem I later discovered which is not uncommon on the MGF.
An extensive search on the internet and enquiries with fellow MGF owners and service centres failed to find an easy fix – the problem being that the discoloured lens is located within the sealed headlamp unit.
The only option left was a complete headlamp unit replacement. This course of action may also be necessary in the case of accident damage to the headlights or if sending the reflectors away for re-silvering.
Fortunately, rather than waiting until the next MOT was imminent, I decided to tackle the situation early and discovered the first problem – sourcing a pair of new headlamp units, which can be as rare as poultry dentures.
It transpires that the units are manufactured overseas (isn’t everything these days) and only occasionally arrive in large consignments which can be snapped up very quickly.
At the time I started my search I was told there wasn’t a single unit available in the country, so I was put on a waiting list for a new batch. Six months later (yes six months) and my supplier finally said they had arrived but if I wanted them I needed to get in quick as most had already gone.
The lack of supply also resulted in a significant increase in the price. While on-line forums at the time quoted a new unit at £70 I had to pay close on £400 for the pair.
There is mixed news for anyone planning to replace their MGF headlamp units today. Good news is that the MGOC parts department assure me (at the time of writing) that they have headlamp sets in stock. The bad news that the price is now £218 (including VAT) for each headlamp assembly so that’s £436 for a pair of nearside and offside units.
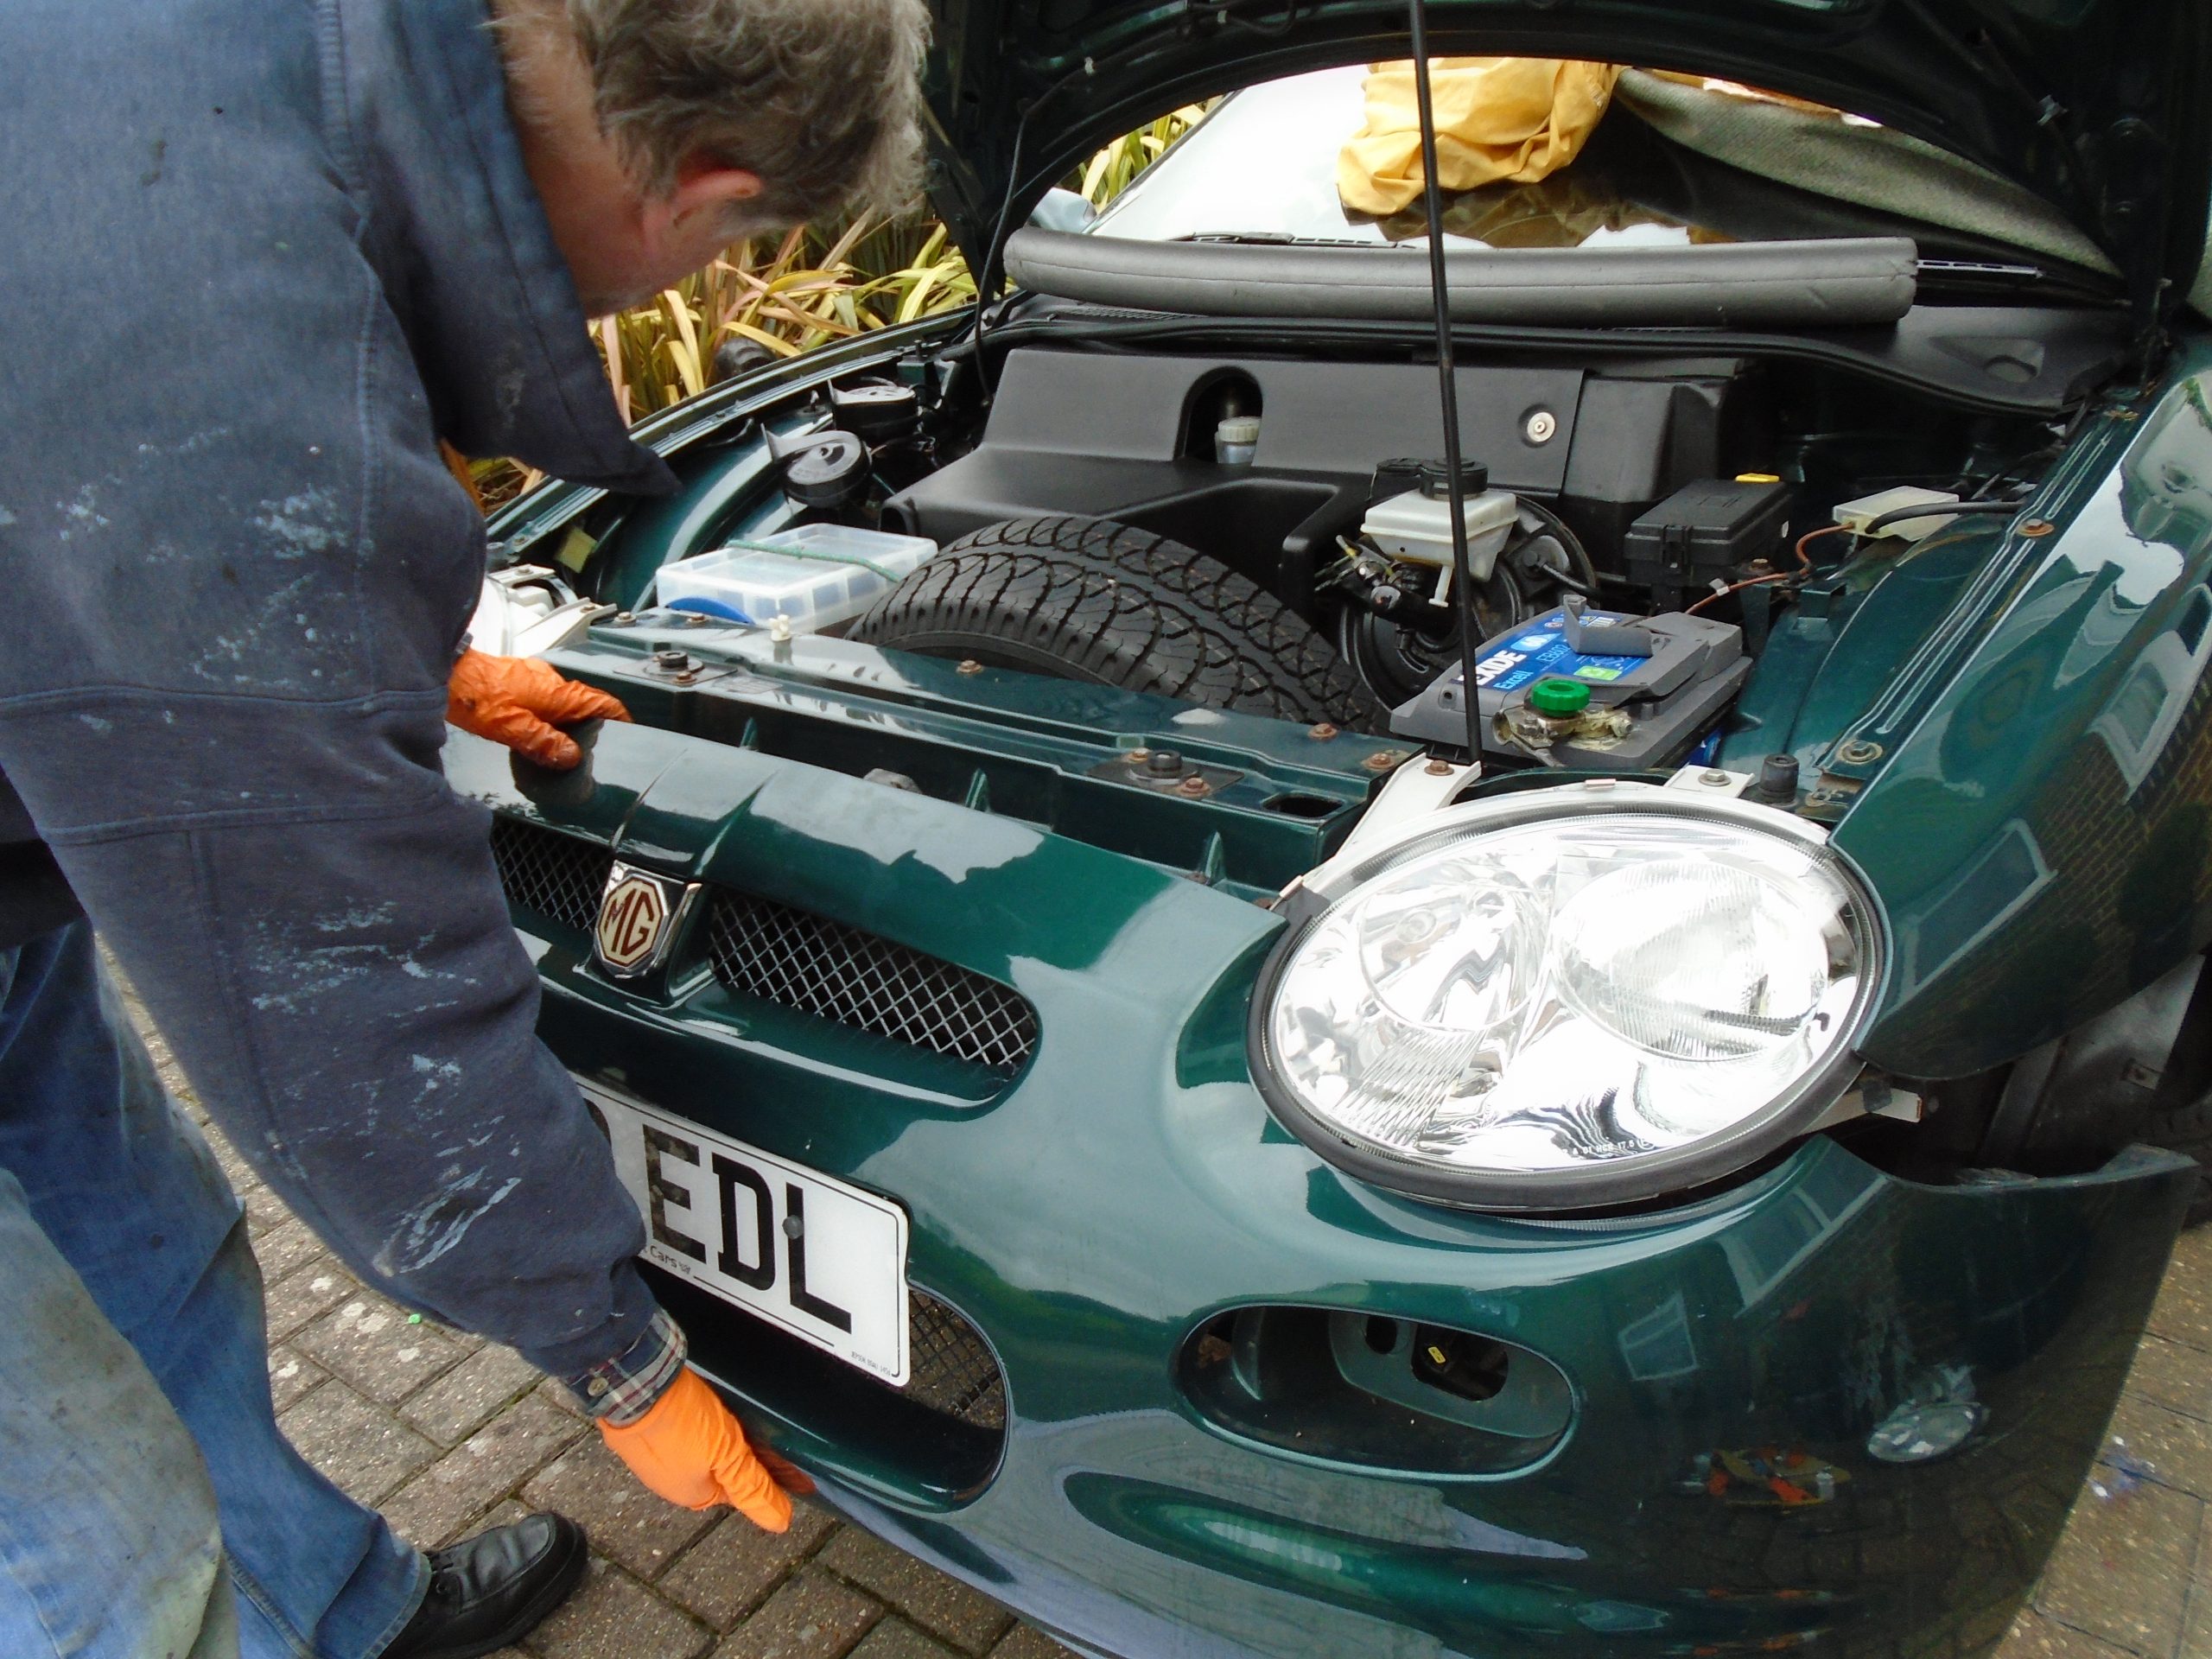
Over the years I have owned numerous modern cars and reaching and replacing individual headlamp units has in the main been a relatively simple task, but for some reason the designers of the MGF decided that if you want to undertake this task it is necessary to remove the entire front bumper and that applies to replacing both or just one headlamp.
Better news is that replacing the headlamps requires very few tools and can be undertaken by anyone with the minimum of mechanical experience. You are going to need a second pair of hands to help lift on and lift off the bumper without risking damage.
Although not entirely necessary, I would also advise jacking up the car and removing the front wheels – this just allows easier access to the inner wheel arch linings.
I have read instructions that suggest the task of replacing both headlamps can be achieved in less than an hour – first timers should allow double that and take your time.
This is how I undertook the task. .
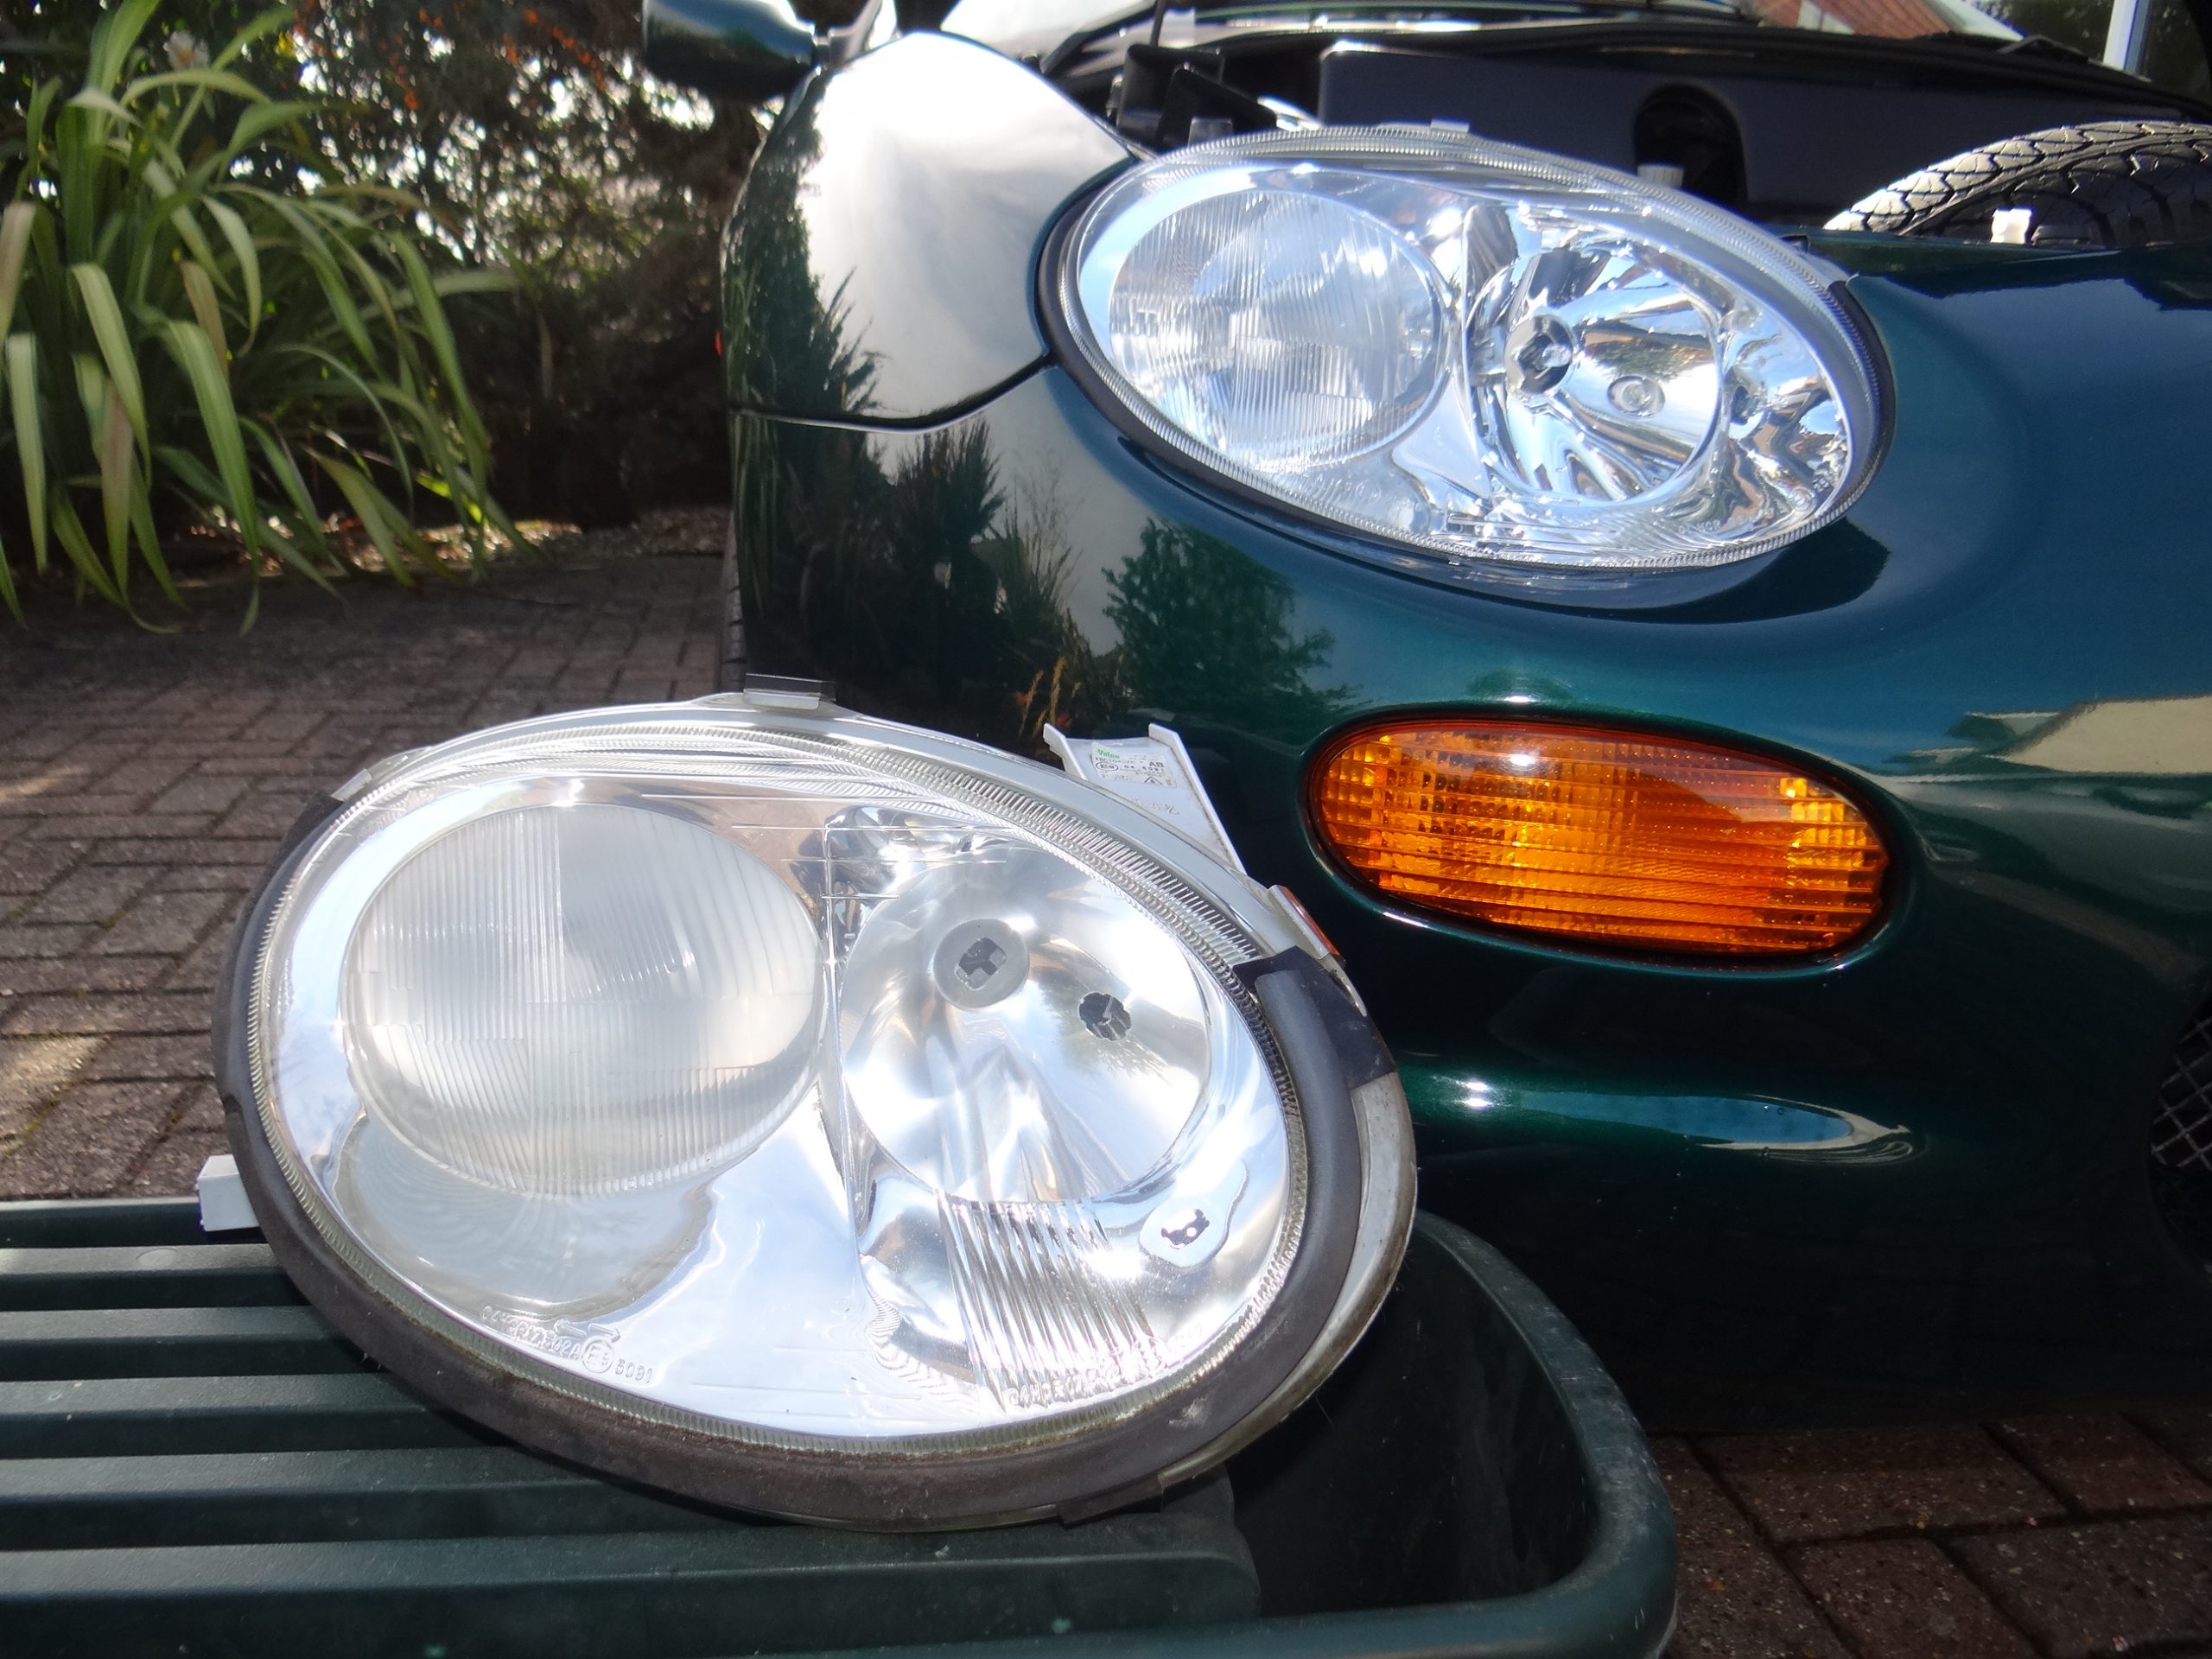
1 – Older MGF headlamp unit showing the signs of discolouration with age that at some time is likely to become the cause of an MOT failure – changing the headlamp unit is a worthwhile precaution.
2 – Tools required are a 10mm socket, a 17mm socket with an extension bar, a selection of Phillips screwdrivers, a large flat screwdriver and a can of easing fluid for any recalcitrant bolts and screws.
3 – Use the easing spray fluid on the self-taping screws and bolts that hold the bumper in place along the front edge and also apply some to the bolts retaining the headlight units to help things along.
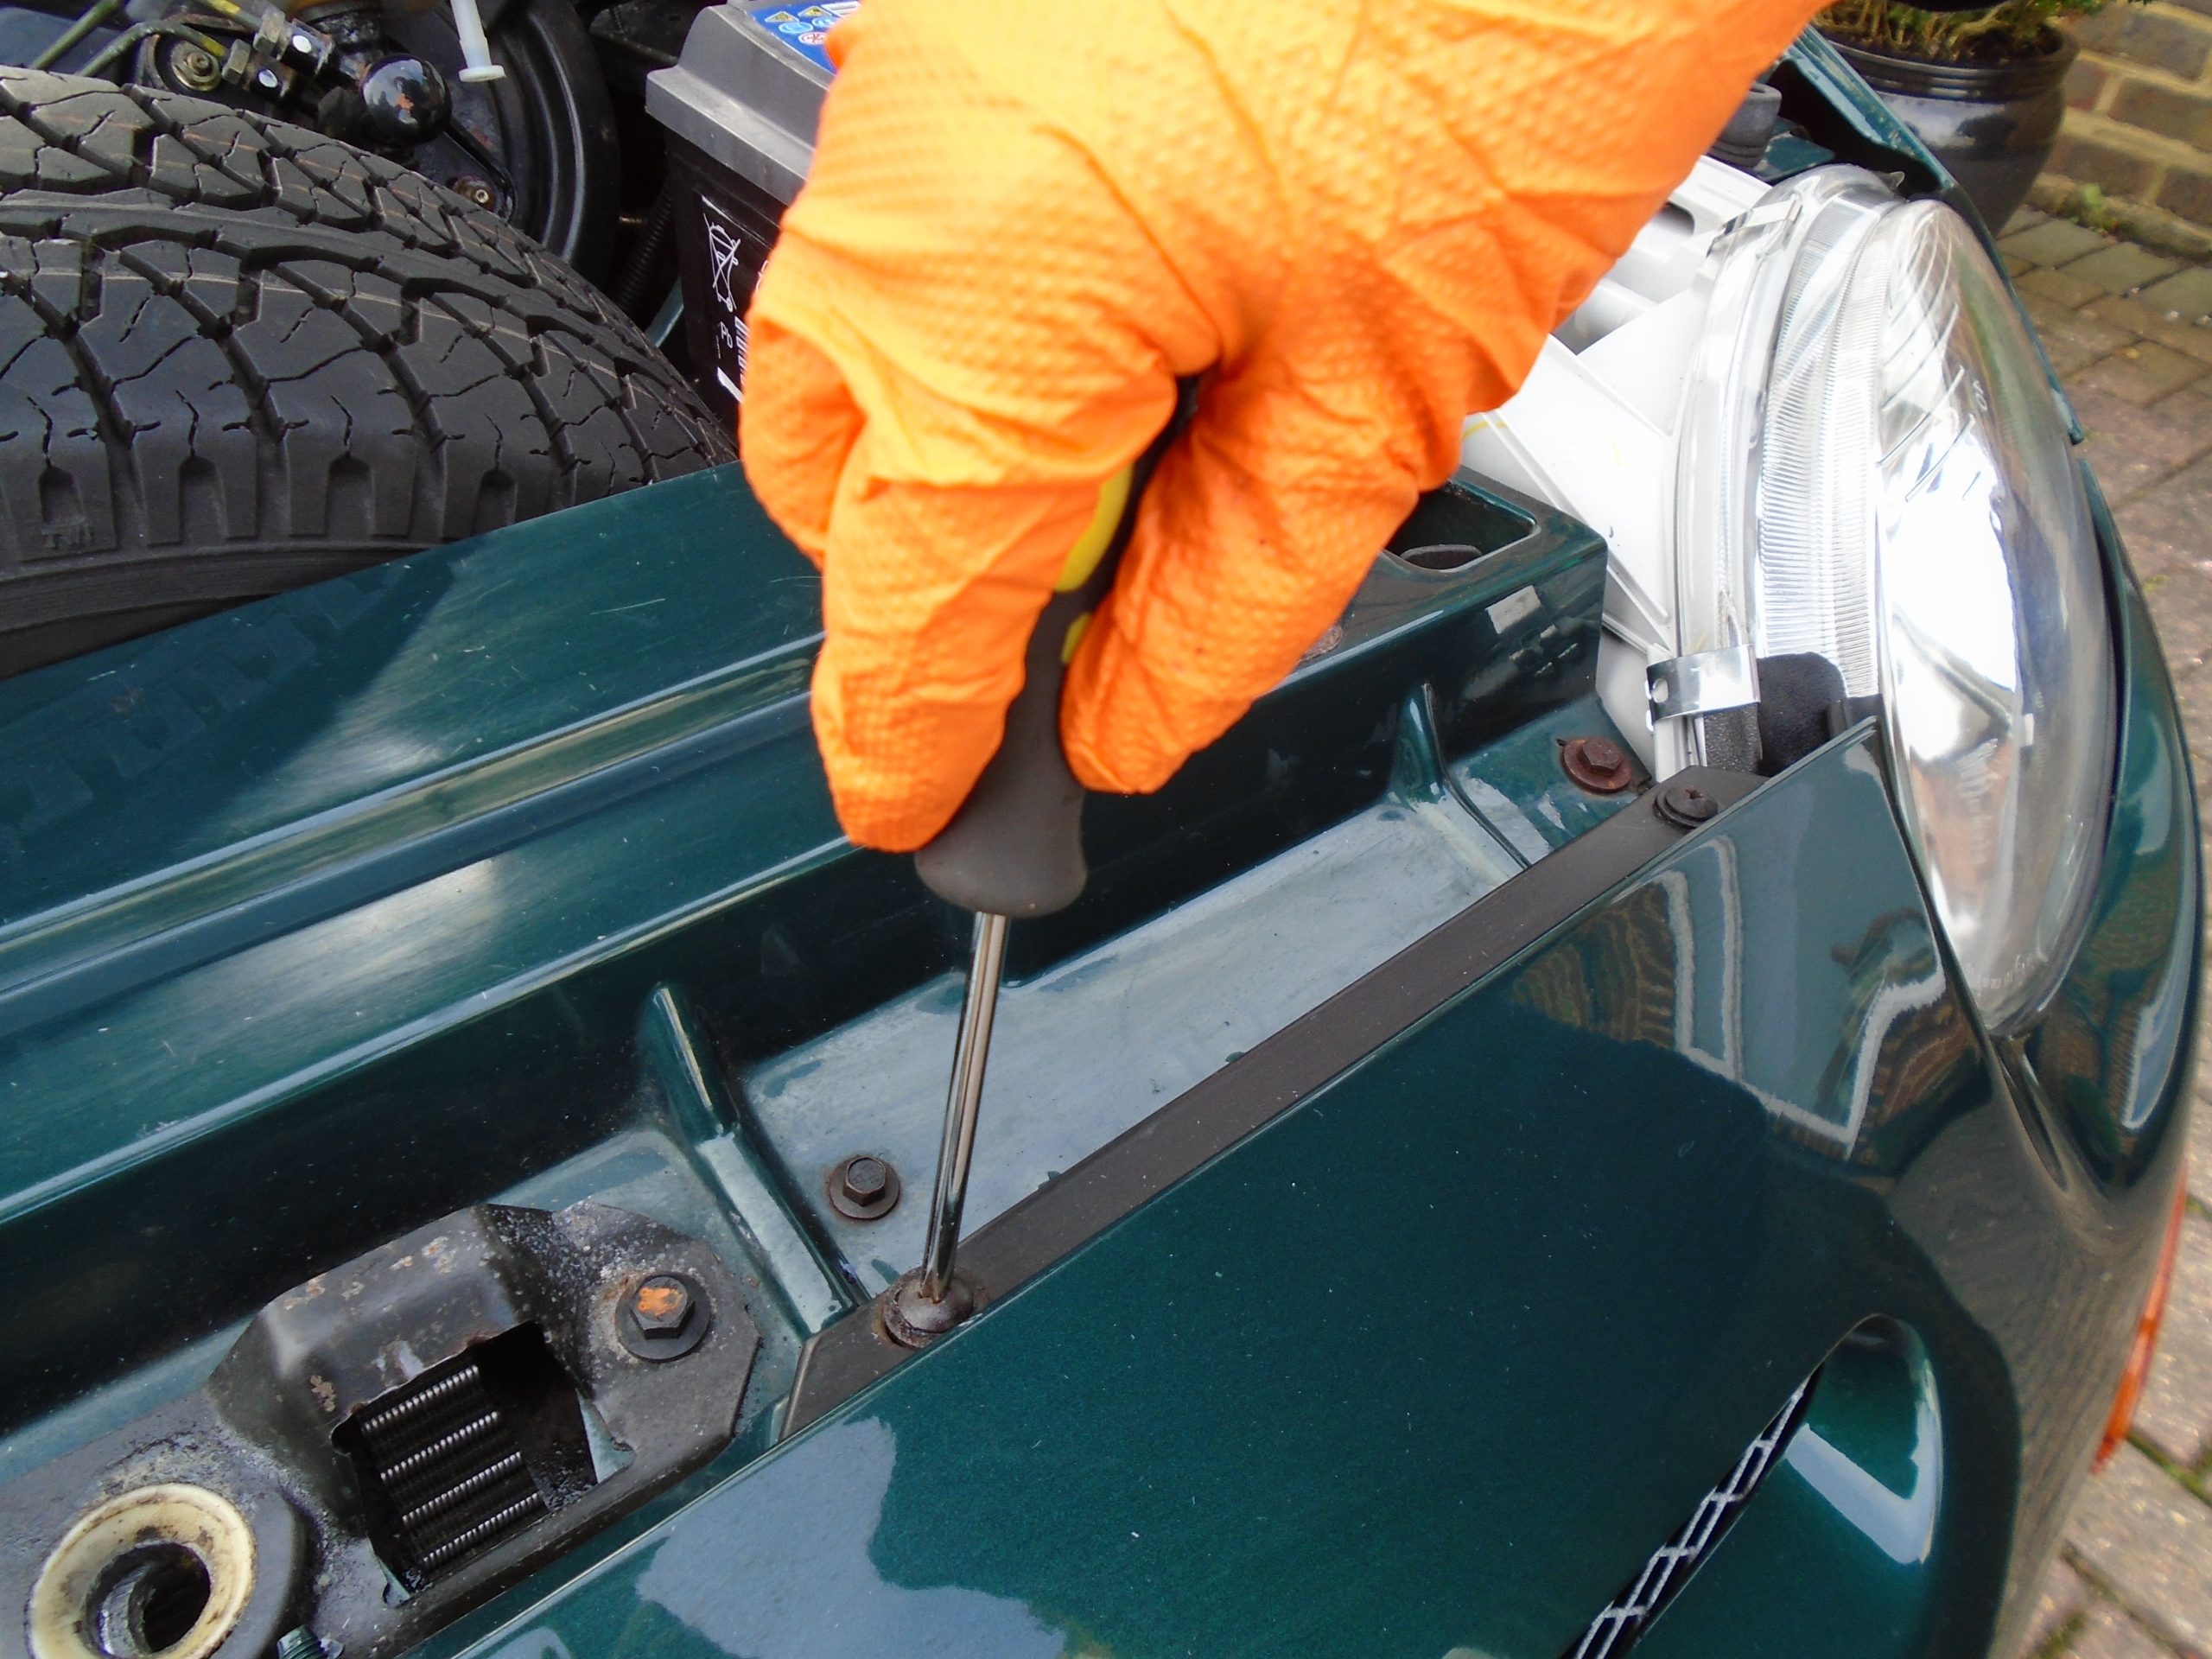
4 – With the bonnet open and secured, the first operation is to undo completely the two 10mm bolts on the top of each headlamp unit (remembering to safely store for later use).
5 – Next, remove the row of five Phillips head screws along the top edge of the bumper. These may have become corroded over time so be careful when undoing.
6 – Although not essential, it is advisable to loosen the bolts closest to the headlamps that hold the front wings in place – this will assist in fitting the new units later on.
7 – Use a flat screwdriver to prize open the catch that retains the recessed indicator lens in position within the bumper, you can use a piece of cloth to protect the paintwork while you do this.

8 – Before going too far, disconnect the power connector lead at the back of the indicator before removing completely – repeat on the other side and store the indicators carefully.
9 – This reveals the bumper retaining bolt that is hidden behind the indicator lamp alongside the connector lead – this should now be very easy to reach to undo.
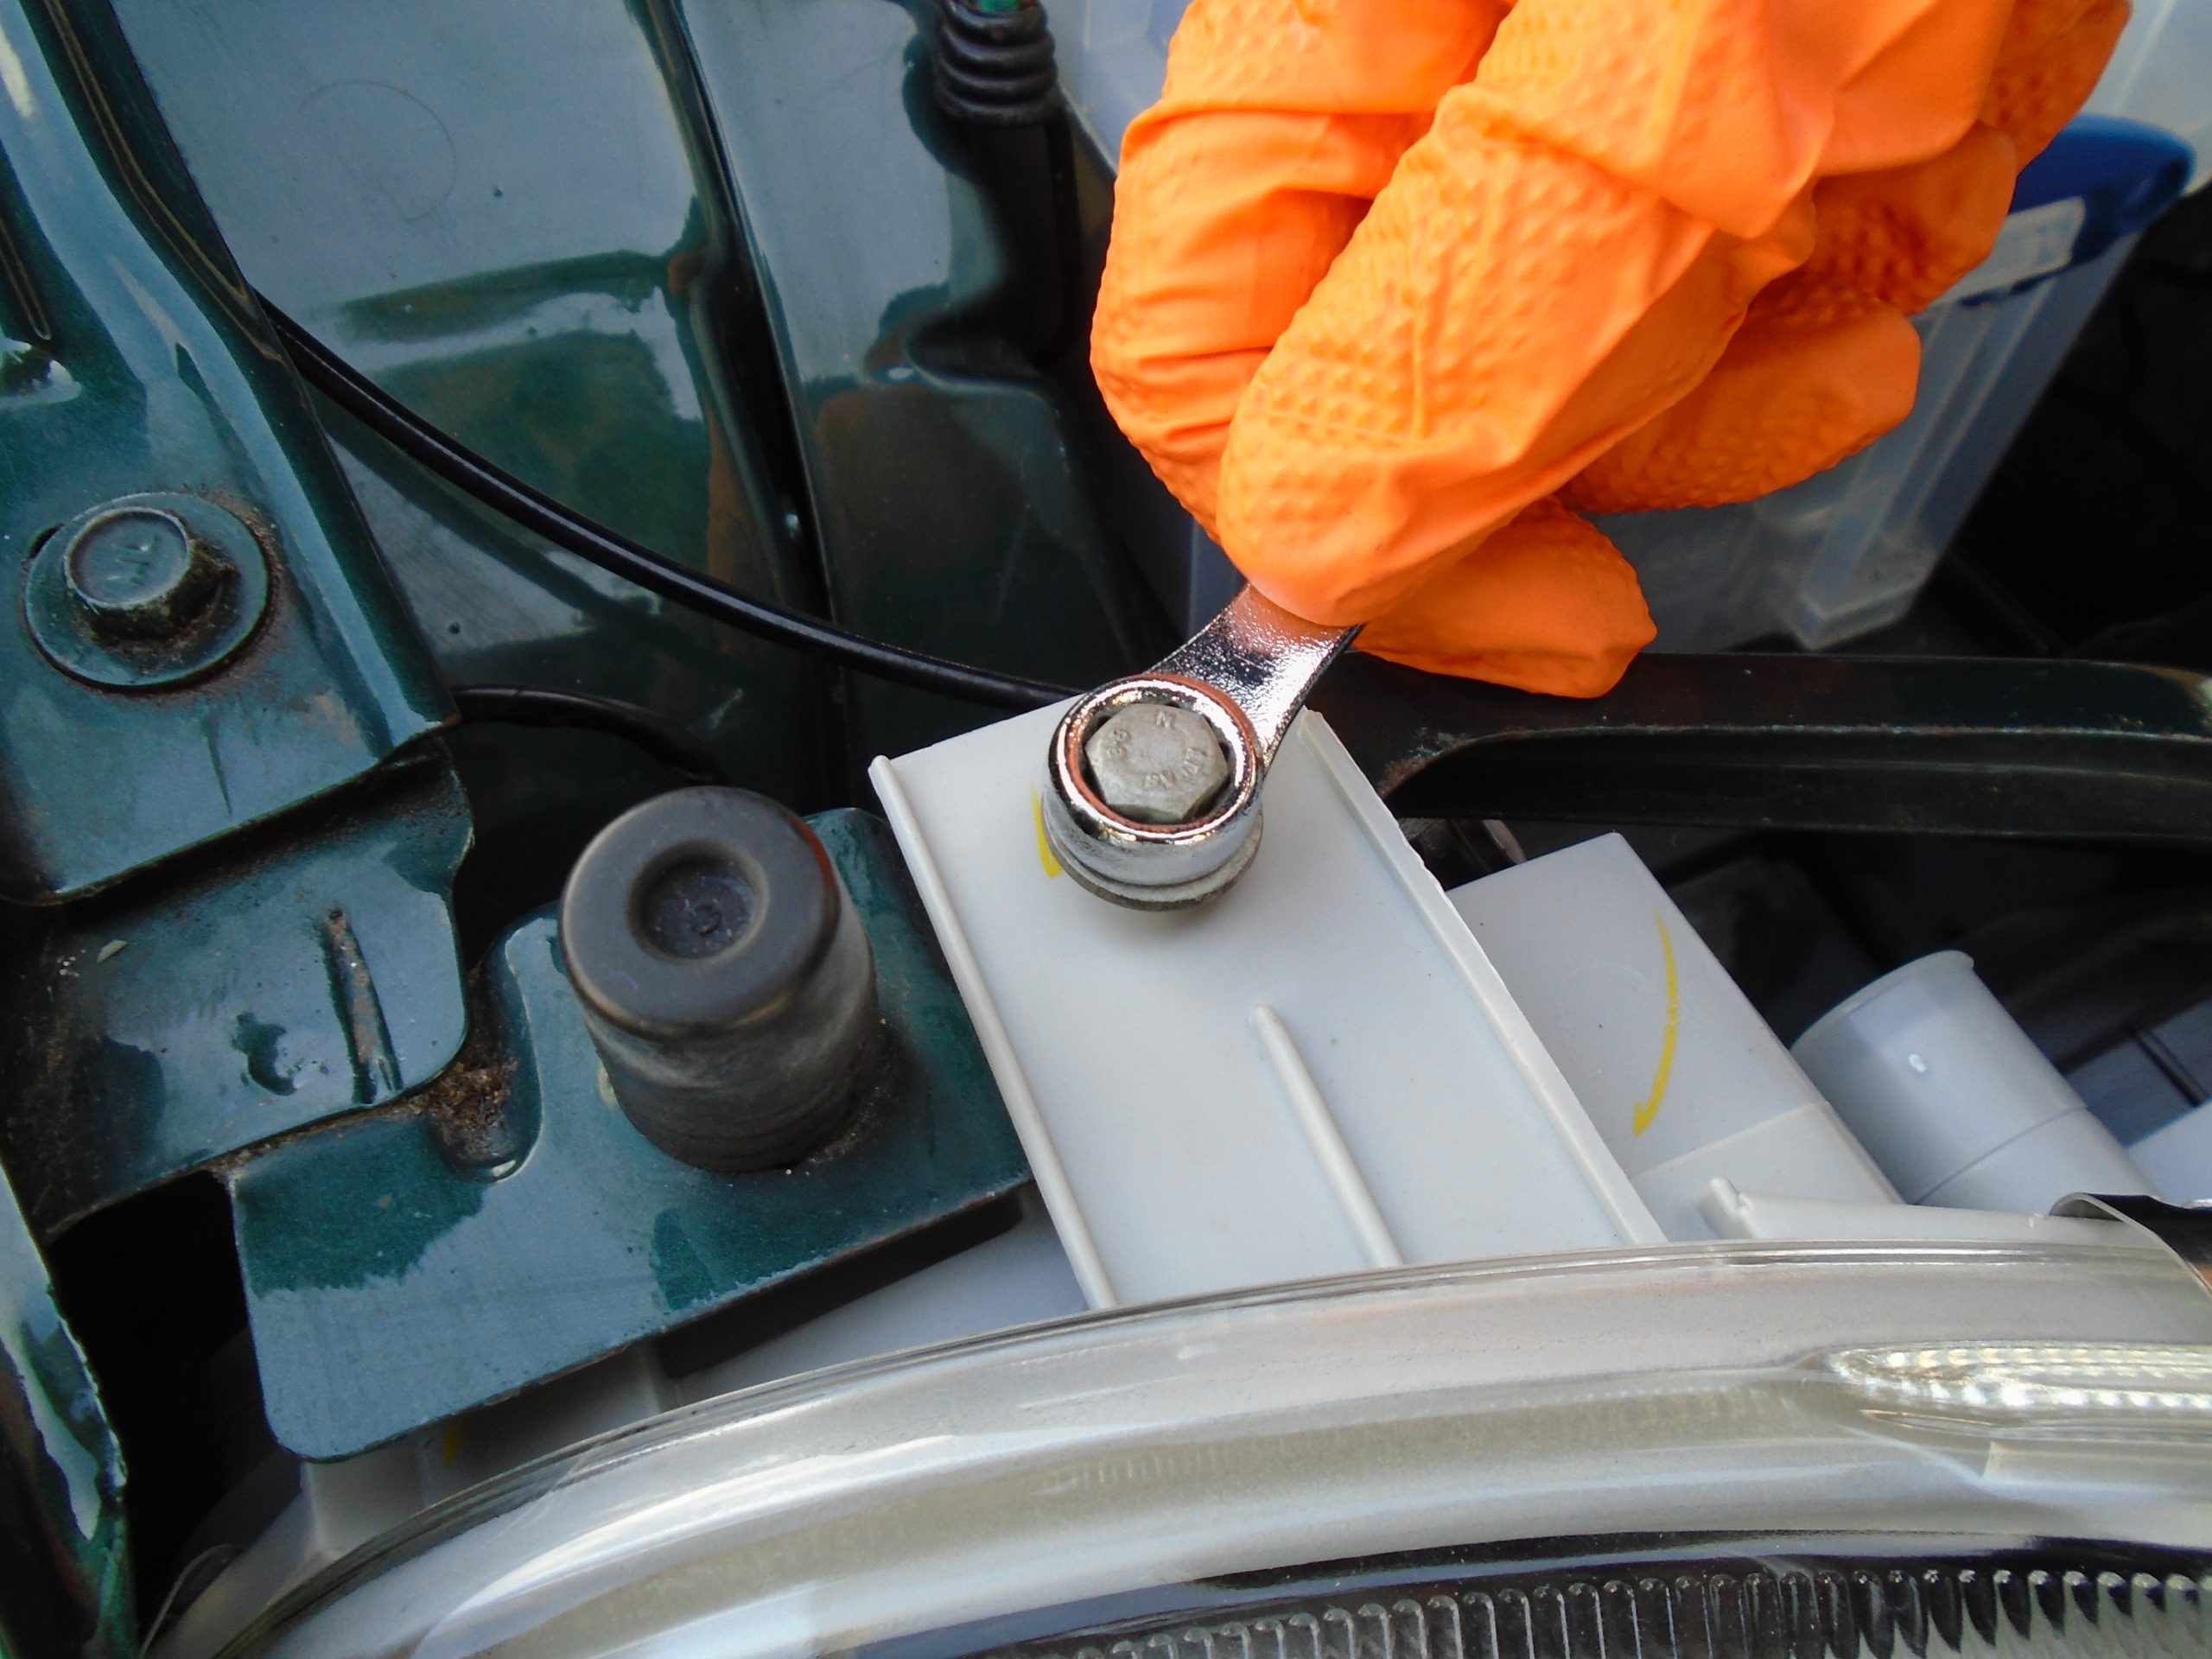
10 – Remove this retaining bolt using the 17mm socket from your tool kit– depending on the length of your socket head you may also need an extension bar to reach the bolt.
11 – Moving to the wheel arch, remove the two Phillips screws that attach the bumper to the protection cover and peel back the plastic inner lining – this is where having the wheel removed makes life easier.
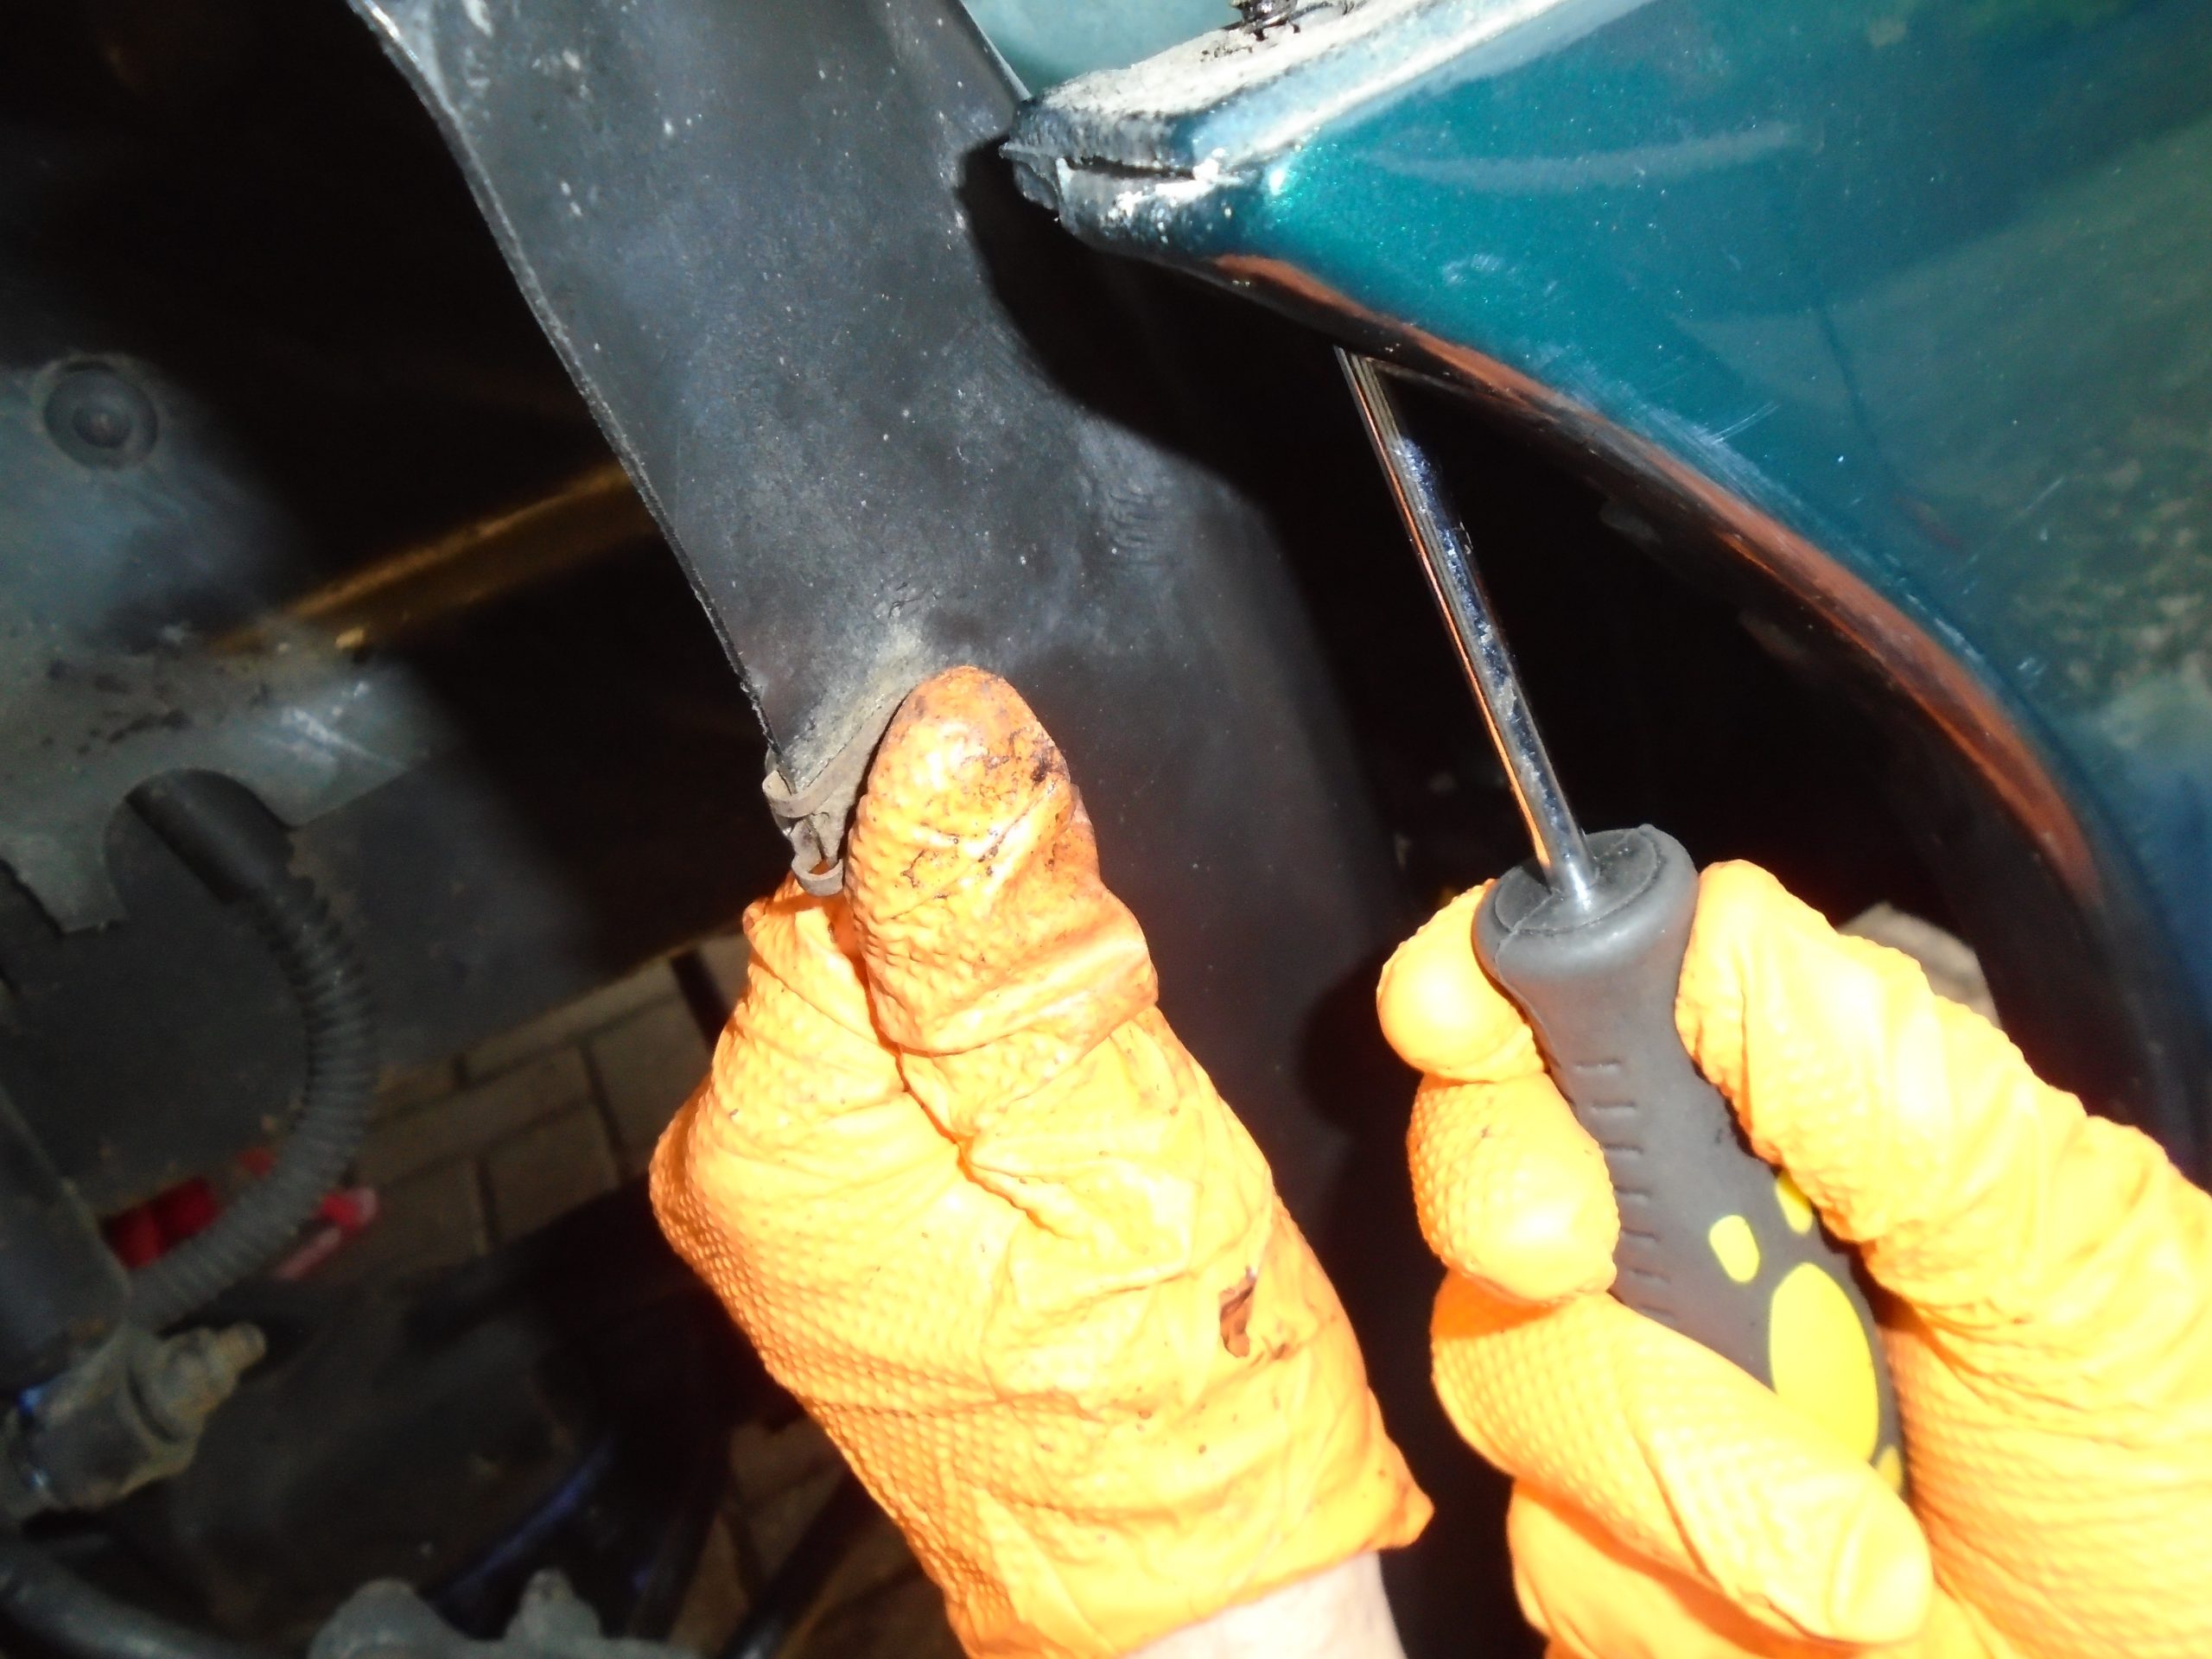
12 – This will reveal two screws located behind the bumper – a second person to hold the liner and a torch is useful. Remove the screw nearest the wheel assembly and then loosen the screw deeper inside the bumper.
13 – At this stage everything holding the bumper in place should have been released allowing it to be removed – I would advise laying the bumper on an old sheet or blanket to stop any scratches.
14 – With the front chassis exposed, undo the Phillips screw on the side of the headlamp unit. Having previously loosened the bolt you can ease the wing out a fraction and partially lift out the headlamp unit.
15 – Before you got too far with the headlamps remember to release the wires on the back of the unit by pressing down on the plastic release connectors and pulling away.
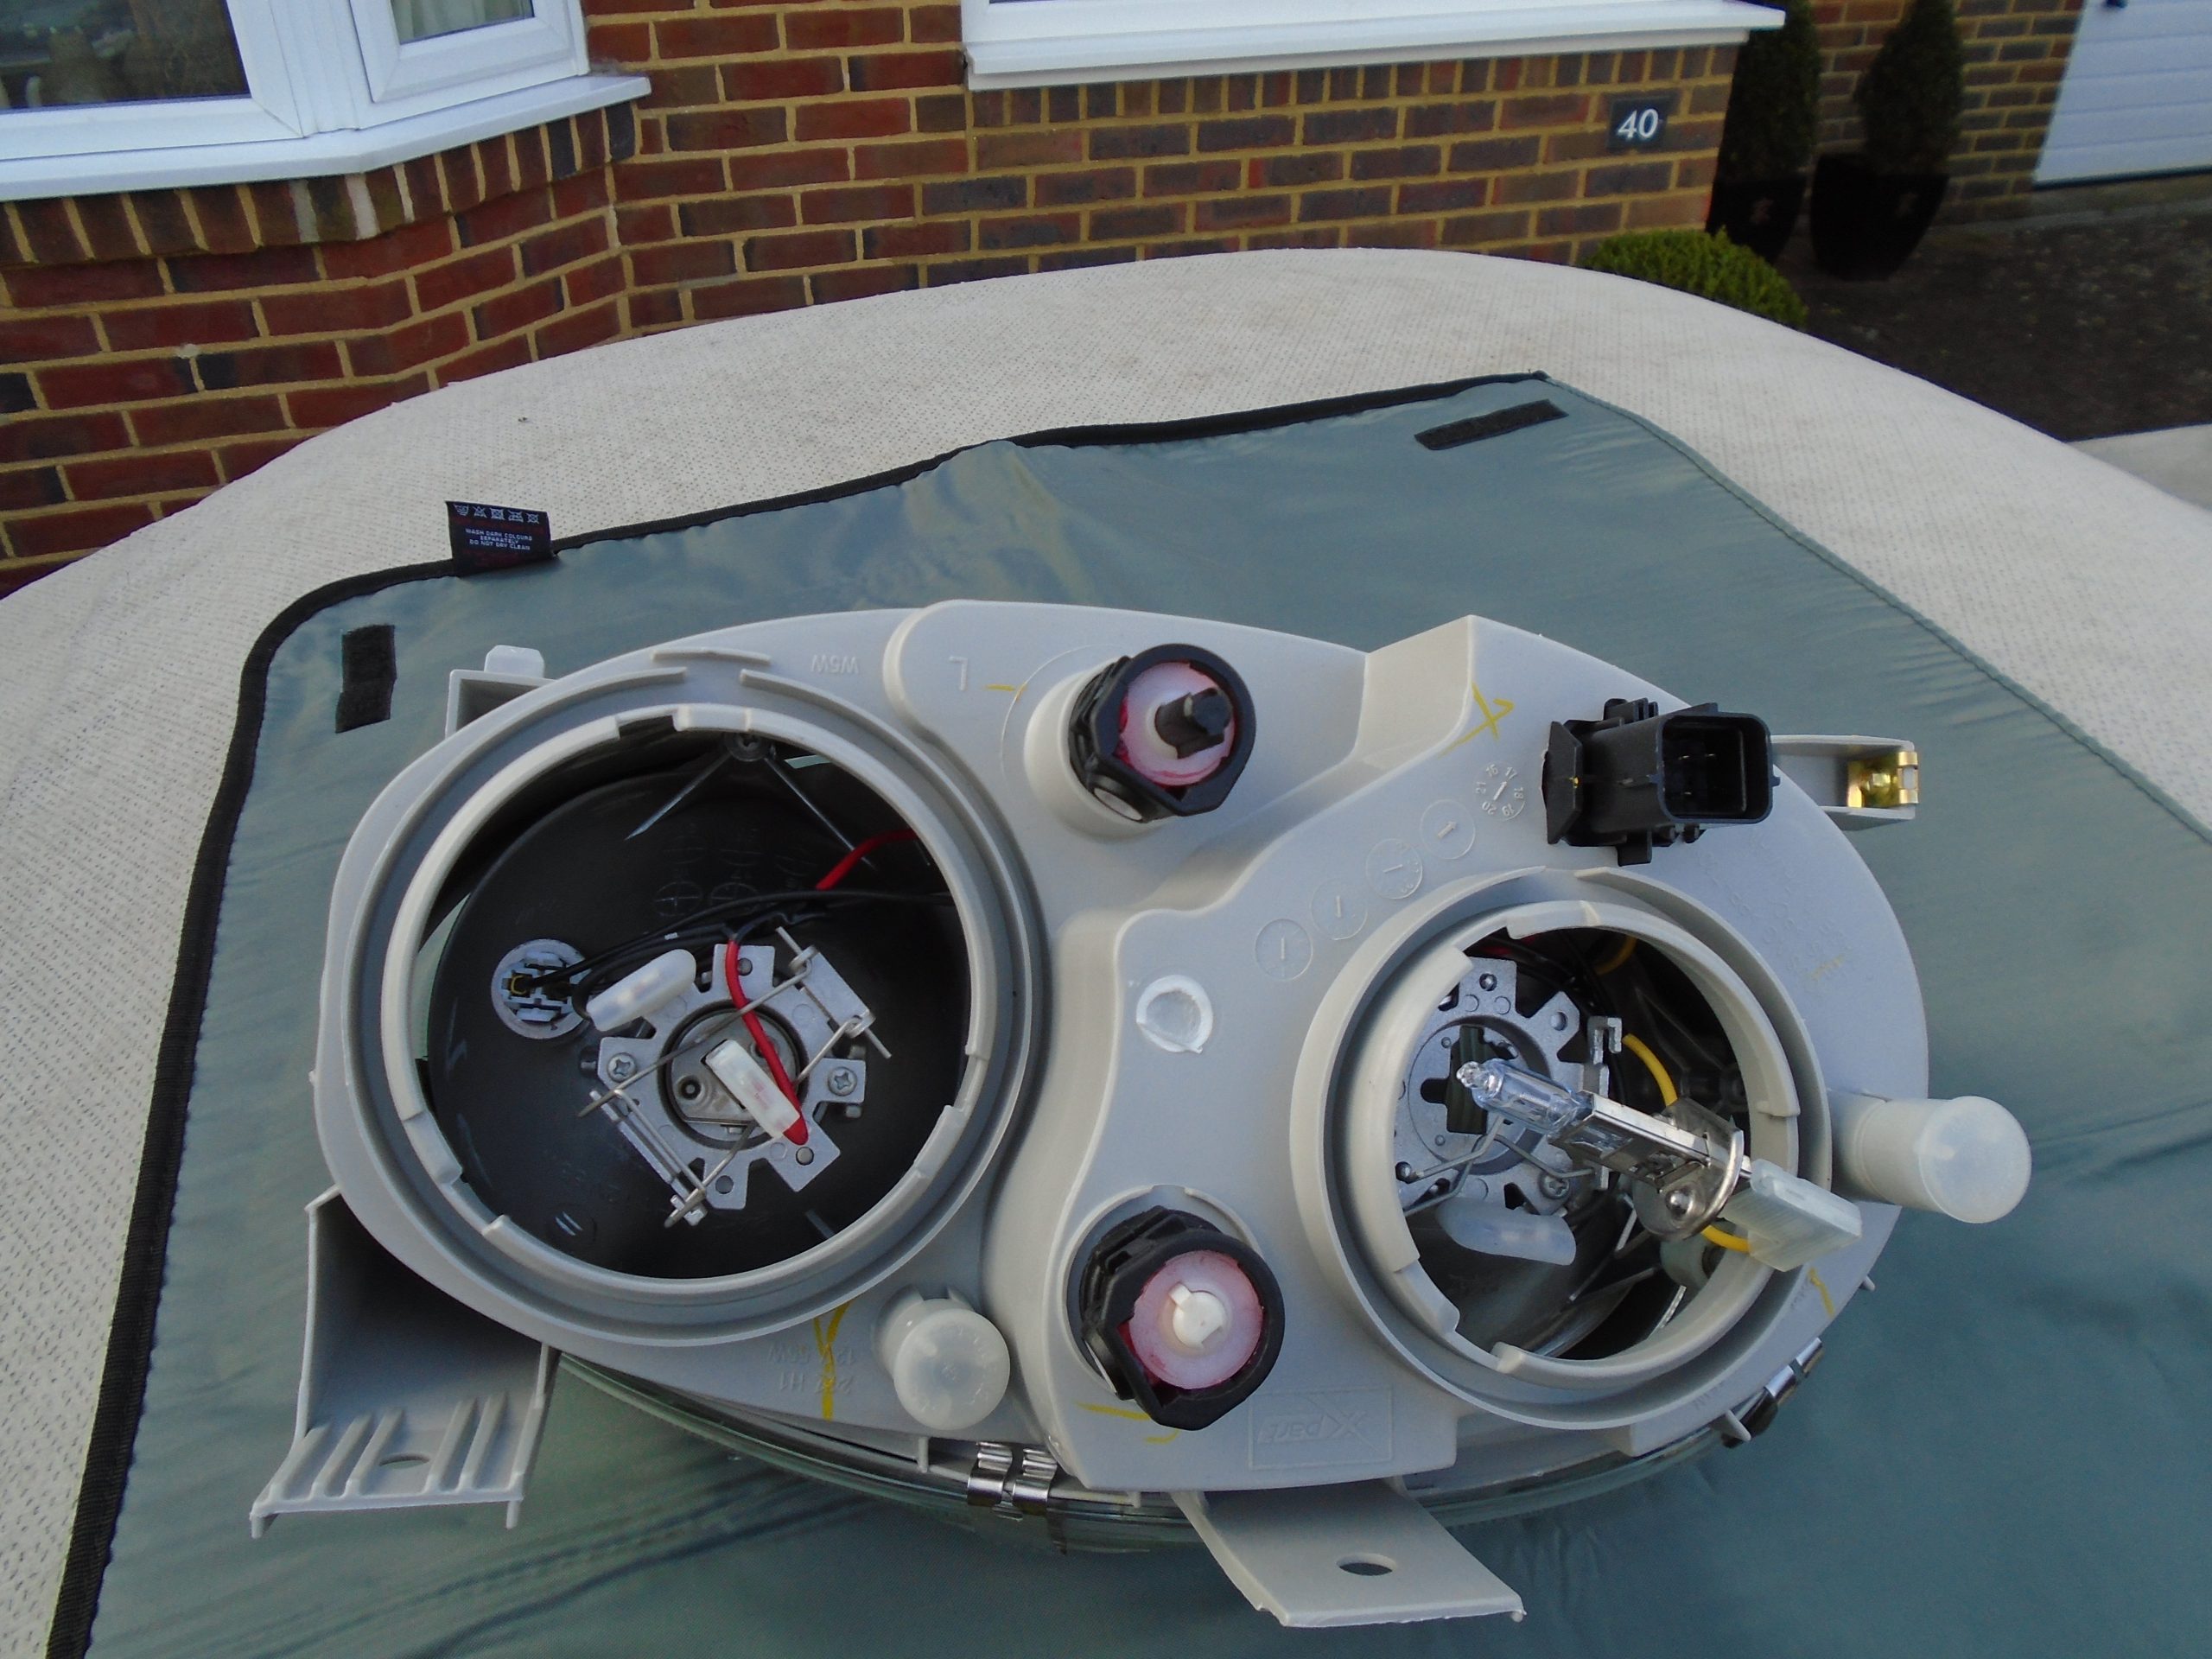
16 – The headlamp should now be ready to remove as one unit – repeat on the other side of the car and place both units on a flat surface so that you can work on them.

17 – Unscrew the two covering lids on the back of the headlamp units and release the bulbs from the retaining clips holding them in place – these are a bit fiddly, especially wearing gloves.
18 – Once removed, the existing bulbs can be slotted into the new units and the back covers screwed into place. You may want to use new bulbs which will be an additional cost.
19 – Connect the wiring clips to the new headlamps and fit into place using the bottom lug and the corresponding rectangular hole on the front cross member as a guide before securing in place with the bolts.
20 –The seals around on the old units will have become compressed and seals on the new units will be much thicker so you will need to make some adjustment with the front wings to ease them into place.
21 – Re-attach the front bumper in the reverse order of how it was removed – a second pair of hands will be useful to hold the bumper in place while the various screws and bolts are fitted.
22 – The final operation will be reconnecting the indicators and then popping them back into their recesses using the retaining clips – this will complete the task.
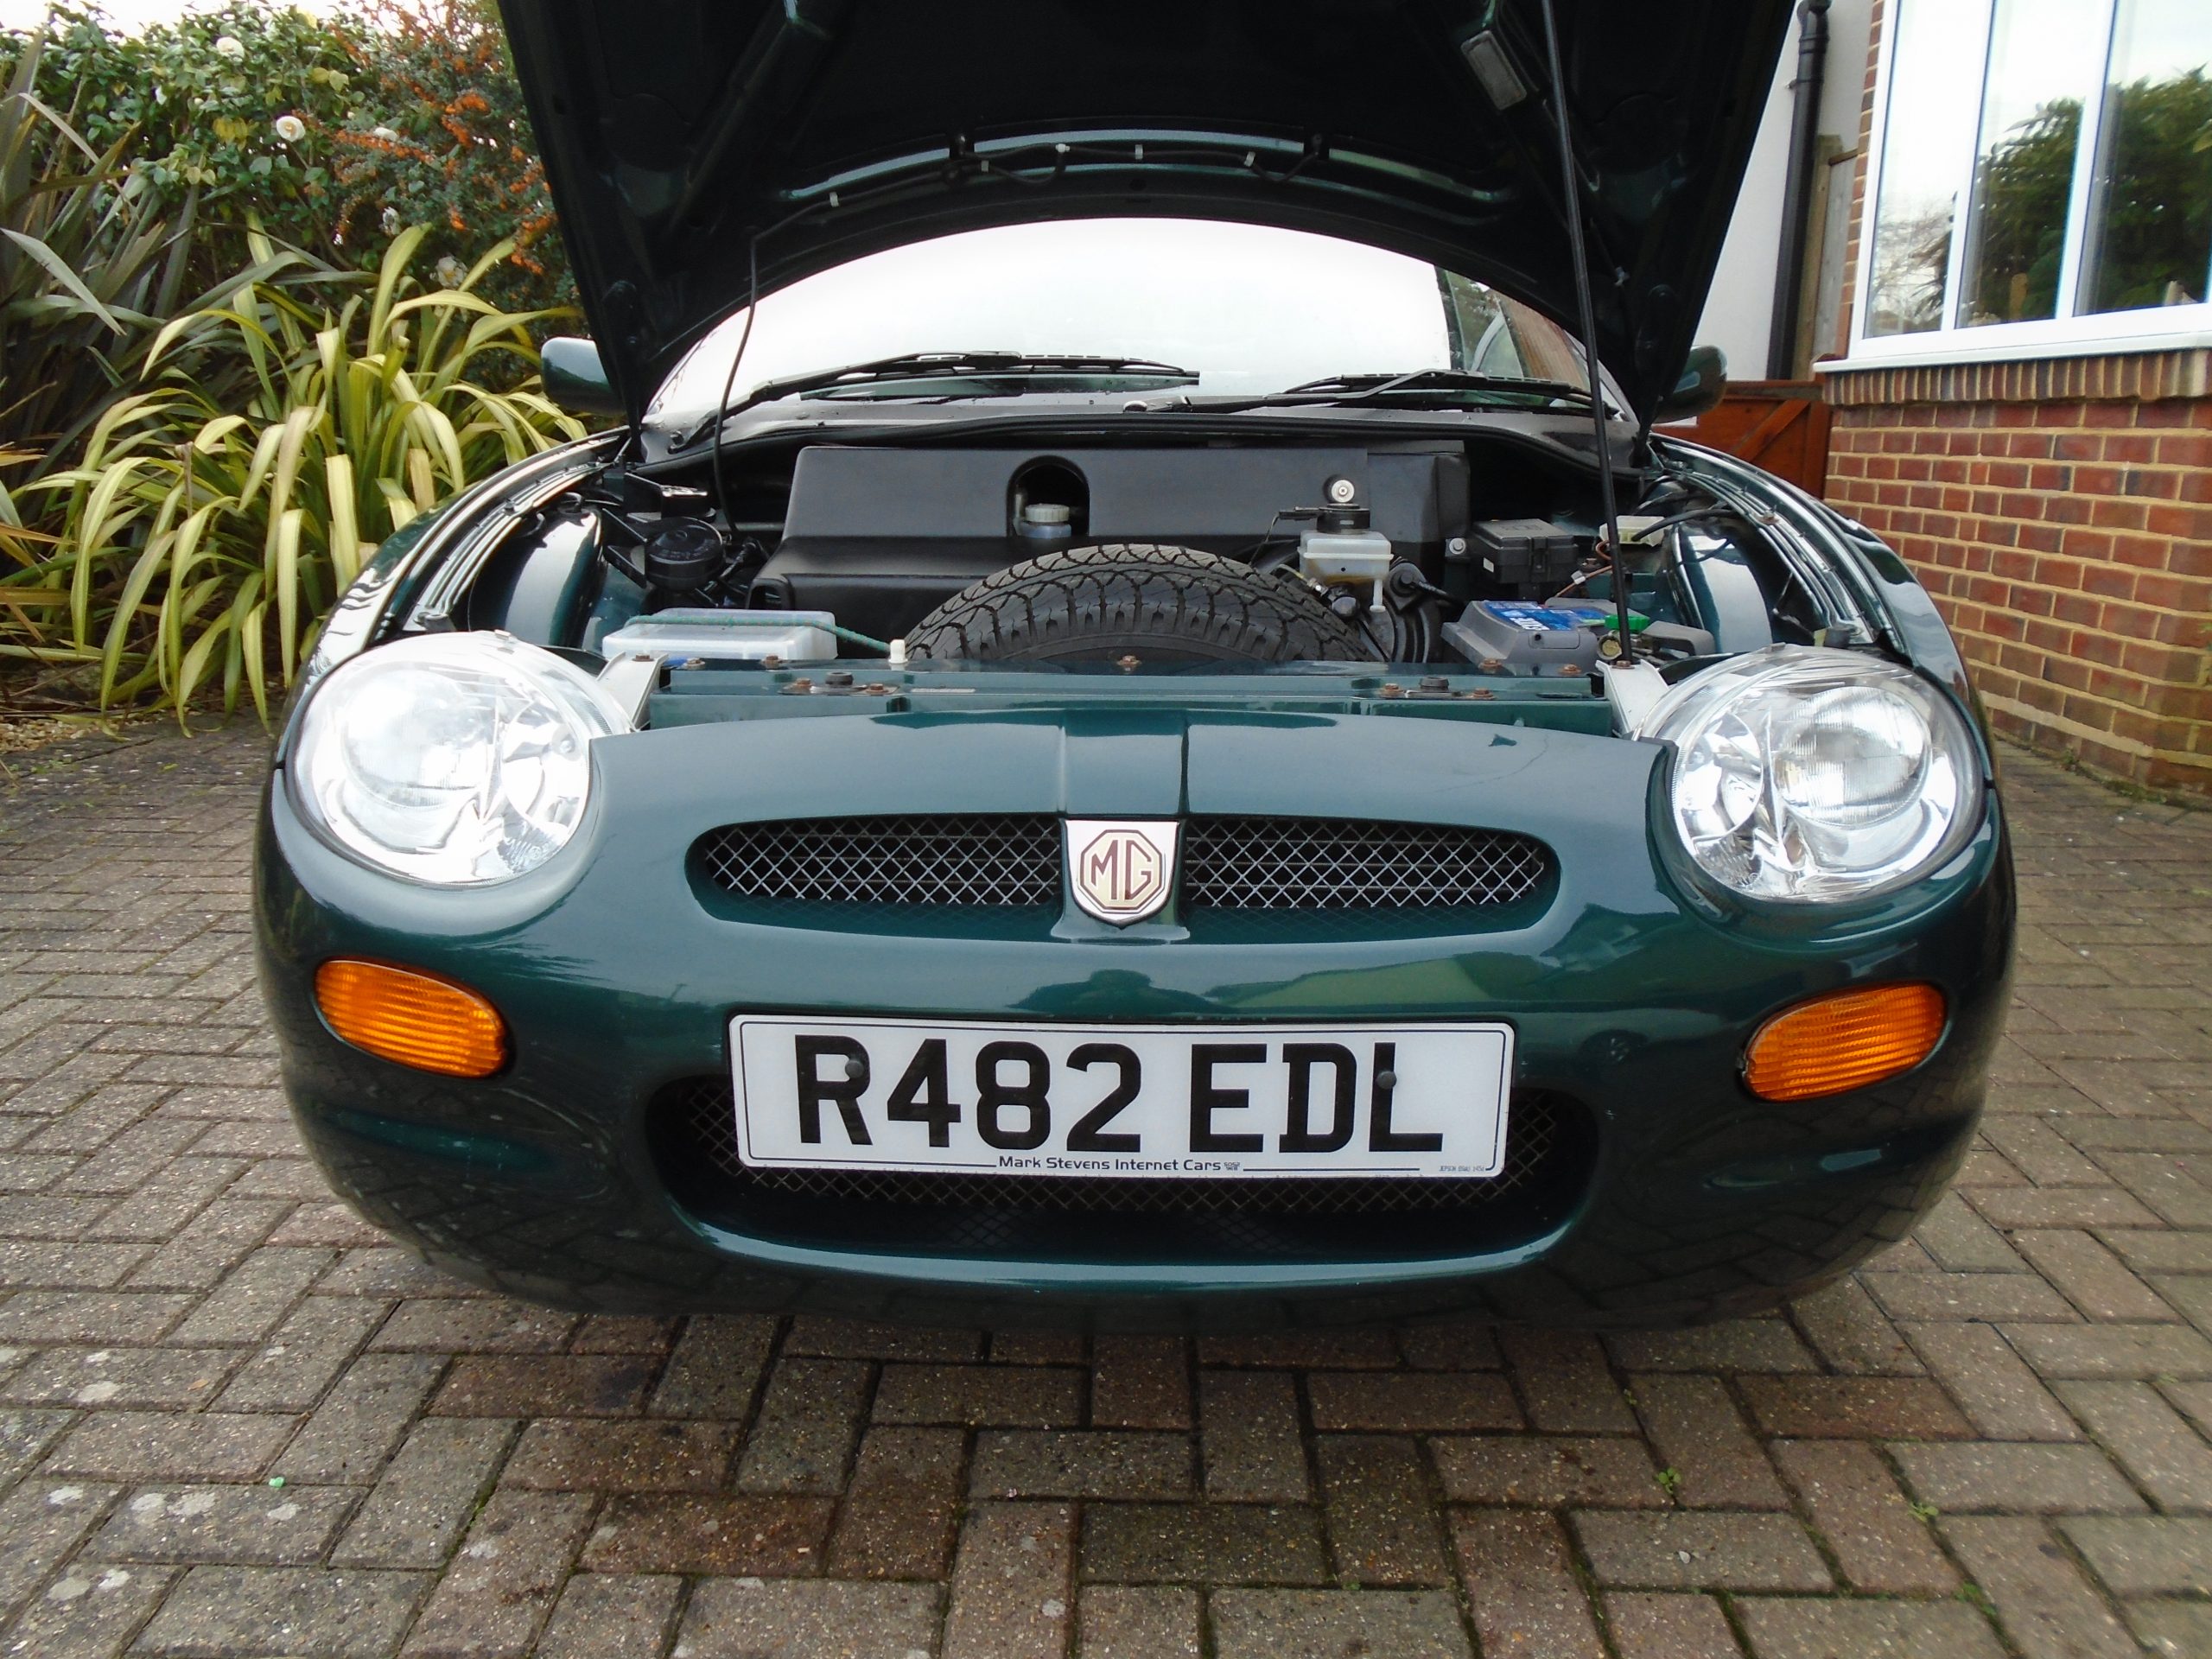
23 – Spot the difference – comparing old and new headlamp units shows how the old headlight diffuser had become obscured. Once complete you should check the headlamp alignment.